Solar Battery Panels Needed, Safety, Weatherproofing, Clipping & Health
As solar energy becomes more mainstream, integrating battery energy storage has shifted from being a luxury to a practical necessity for homeowners and businesses. Solar batteries let you store daytime solar generation for nighttime use, improve resilience during grid instability, and increase self-consumption of solar power.
However, to get the most out of a solar battery system, you need to understand how many solar panels are required, what safety standards apply, whether batteries can be installed outdoors, what inverter or battery clipping means, and how to monitor battery health and recognize warning signs.
This guide covers the essential aspects of solar battery energy storage, from how many solar panels are needed to charge your battery, to key safety standards like UL and IEC certifications, weatherproofing and outdoor installation tips, inverter clipping effects, and how to monitor battery health over time. Whether you’re setting up a new solar-plus-storage system or upgrading an existing one, understanding these factors ensures your setup remains efficient, safe, and long-lasting.
Note: The brands listed are not ranked in any particular order.
Disclaimer: The company names, founding dates, and addresses are sourced from publicly available information online.
Please note: The list in this guide is not exhaustive. There may be other reputable solar battery brands worth considering.
How Many Solar Panels Are Needed to Charge a Solar Battery?

The number of solar panels needed to charge a solar battery depends on three key factors, the battery’s capacity (in kilowatt-hours), the wattage and efficiency of each solar panel, and the average sunlight hours available in your area.
For example, a 10 kWh battery paired with 400 W solar panels in a region receiving about 5 hours of peak sunlight per day would typically require around 5 panels for a full charge. However, weather, system losses, and inverter efficiency can influence the actual number, so it’s best to calculate based on real-world conditions rather than theoretical values.
As solar energy becomes more popular, homeowners and industrials are looking for efficient ways to store solar power for later use. One of the most common questions people ask is: “How many solar panels do I need to charge my solar battery?”
The answer isn’t a one-size-fits-all number, it depends on your battery’s capacity, solar panel wattage, sunlight hours, and overall system efficiency. In this guide, we’ll break down exactly how to calculate this, discuss real-world examples, and help you understand how long it takes to fully charge a solar battery with your panels.
Understanding the Relationship Between Solar Panels and Battery Capacity
Solar panels convert sunlight into direct current (DC) electricity, which can either power your home directly or be stored in a battery for later use. The more solar energy your panels generate, the faster your battery can charge.
However, battery charging is limited by the total power your solar array produces and by your inverter or charge controller’s capacity. In short: Charging Speed (kW)=Solar Array Power (kW)−House Load (kW)
If your panels produce 5 kW but your house is using 2 kW, then only 3 kW is available to charge your battery.
What Factors Determine How Many Panels You Need?
The number of solar panels required to charge a battery depends on:
- Battery Capacity (kWh): The total energy the battery can store.
- Panel Wattage (W): How much power each panel produces under full sunlight.
- Sunlight Hours: Average peak sun hours per day in your area.
- System Efficiency: Includes inverter losses, temperature effects, and cable losses (typically 85–95%).
- Charging Window: Whether you plan to charge fully in 2 hours, 4 hours, or across a full day.
How to Calculate How Many Solar Panels You Need?
To determine the number of solar panels needed to fully charge a battery, use the formula:
Number of Panels=Battery Capacity (kWh) / Panel Power (kW)×Sun Hours×Efficiency
Where: Panel Power (kW) = panel wattage ÷ 1000; Efficiency = typically 0.85 – 0.9.
Let’s look at a few examples using different system sizes and conditions.
Example 1:
10 kWh Battery + 400 W Panels + 5 Sun Hours
Panels=10(0.4×5×0.9)=101.8≈5.5
So, you’d need 6 panels of 400 W each to fully charge a 10 kWh battery in about one sunny day.
Example 2:
5 kWh Battery + 300 W Panels + 4 Sun Hours
Panels=5(0.3×4×0.9)=51.08≈4.6
That means you’d need 5 panels of 300 W each to fully charge the battery daily.
Example 3:
20 kWh Battery + 550 W Panels + 6 Sun Hours
Panels=20(0.55×6×0.9)=202.97≈6.7
You’d need 7 panels of 550 W each, but in real-world conditions, designers may increase this to 8–9 panels to account for cloudy days and system losses.
Real-World Factors That Affect Solar Battery Charging
Sunlight Variability and Climate
The average sunlight hours per day (also called peak sun hours) differ dramatically by region. California, Australia, and Thailand may average 5–6 hours. Northern Europe may only get 2–3 hours during winter months. Fewer sun hours mean you’ll need either more panels or longer charging times.
System Efficiency and Losses
Typical efficiency losses come from:
- Inverter conversion: 5–10% loss when converting DC to AC
- Temperature: high heat reduces panel efficiency
- Dust or shading: 5–15% loss possible
- Battery charge controller limits: may restrict input current
Designers typically assume 85–90% total efficiency to calculate realistic outcomes.
Battery Type and Charge Acceptance Rate
Not all batteries can accept charge at the same rate.
- Lithium-ion / LiFePO₄ batteries: can typically charge faster (1C rate = full in 1 hour).
- Lead-acid batteries: charge more slowly due to internal resistance and need a long absorption phase.
Always check the manufacturer’s specifications for recommended charge current.
How Long Does It Take to Charge a Solar Battery?
To estimate how long a solar battery will take to charge, use this simple relationship:
Charging Time (hours)=Battery Capacity (kWh)Solar Array Power (kW)×Efficiency
For example, a 10 kWh battery charged by a 5 kW array at 90% efficiency will take:
105×0.9≈2.2 hours.\frac{10}{5 × 0.9} ≈ 2.2 \text{ hours.}5×0.910≈2.2 hours.
That’s under perfect conditions, in practice, you can expect 3–4 hours on a sunny day.
Practical Tips for Matching Panels to Batteries
Because of cloudy weather, temperature derating, and system losses, it’s smart to oversize your solar array by about 10–20%. This ensures your battery consistently charges even under non-ideal conditions.
Modern monocrystalline or half-cut cell panels offer better efficiency (21–23%), meaning you can charge your battery faster with fewer panels.
Make sure panels face the right direction and tilt to match your latitude for maximum sunlight exposure. Avoid shadows from trees, chimneys, or nearby buildings.
High-quality MPPT (Maximum Power Point Tracking) controllers adjust the current and voltage dynamically to harvest the maximum available solar energy for charging.
The number of solar panels required to charge a solar battery depends on several variables: the size of your battery, the wattage of your panels, the available sunlight, and system efficiency.
Using the formulas and real-world examples above, you can easily estimate your own requirements. If in doubt, consult a qualified solar installer, they can tailor your system to your exact energy needs and local conditions.
What Safety Standards Do Solar Batteries Need?
Solar batteries must meet strict international safety standards to ensure reliable and risk-free operation. Certifications such as UL 9540, UL 1973, and IEC 62619 test a battery’s electrical, thermal, and mechanical safety under extreme conditions, preventing hazards like overheating, short-circuiting, or fire.
These standards guarantee that solar energy storage systems are built to protect both users and property while maintaining high performance and durability.
In addition, compliance with UN 38.3 ensures safe battery transportation, while UL 9540A evaluates fire behavior in large-scale energy storage systems. Consumers and installers should always verify these certifications before purchase or installation.
Choosing a solar battery with proper safety approvals not only improves system efficiency and lifespan but also ensures peace of mind when integrating clean energy into daily life.
As solar battery energy storage systems become mainstream in homes and commercials, ensuring their safety is more crucial than ever. Solar batteries store large amounts of energy, and improper design, installation, or lack of certification can lead to overheating, fire hazards, or performance failure.
Understanding Solar Battery Safety Standards and Certifications
Safety standards for solar batteries exist to ensure that energy storage products are reliable, durable, and safe for both users and installers. These standards cover electrical safety, thermal stability, chemical composition, and fire protection.
Here are the main certifications that a qualified solar battery system should have:
- UL 9540 – The most recognized certification for energy storage systems (ESS) in North America. It ensures that the battery and inverter combination meet all system-level safety requirements.
- UL 1973 – Focuses on battery modules and packs for stationary applications. It checks performance, electrical integrity, and resistance to thermal events.
- UL 9540A – A fire safety test that determines how a battery system behaves during thermal runaway — critical for large installations.
- IEC 62619 – The international equivalent, covering Li-ion and other rechargeable cells used in industrial and residential energy storage systems.
- IEC 62133 – Applies to portable and smaller batteries, often relevant for off-grid solar kits or mobile storage.
- UN 38.3 – A transportation safety standard, ensuring batteries can be safely shipped by air, land, or sea.
| Standard | Region / Purpose | What It Covers / Why It Matters |
| UL 9540 (and associated UL 9540A test) | U.S. system-level listing for energy storage systems (ESS) | Safety criteria for ESS units (fire, thermal, mechanical), how units can be spaced, etc. |
| UL 1973 | U.S. battery pack safety | Safety of battery pack units and modules (not full ESS enclosure) |
| IEC 62619 | International battery safety standard | Applies to battery cells and modules; tests for abuse, thermal, overcharge, etc. |
| IEC 62109-1 / 2 | Safety of power conversion equipment (inverters) | Ensures inverters meet safety requirements especially when connected to PV arrays. |
| UN 38.3 | Transportation of lithium batteries | Must pass certain tests for safe shipping. |
Having these certifications isn’t just about compliance, it’s about trust and reliability. Certified batteries are tested under extreme conditions, ensuring they resist overcharging, short circuits, and high temperatures. When a solar battery meets these standards, it minimizes fire risks, improves efficiency, and ensures longer operational life.
Also, standards vary by country. Ensuring your battery system has appropriate local certifications (for example UL in US, CE / IEC in EU / UK, etc.) is essential for legal, insurance, and safety compliance.
Why Battery Safety Testing Is Critical for Solar Energy Systems?
One of the greatest risks in lithium-based batteries is thermal runaway, a chain reaction caused by excessive heat. This can result in fires or explosions if not controlled. Standards like UL 9540A and IEC 62619 test how batteries handle heat, overvoltage, and internal faults to prevent such incidents.
Solar batteries undergo tests for
- Overcharge and Overdischarge tolerance
- Short-circuit protection
- Insulation resistance
- Chemical leak containment
These tests confirm that even in harsh conditions, such as a sudden power surge or extreme weather, your battery will remain stable.
Certified solar batteries protect not only property but also people. Installers benefit from clear wiring and grounding standards, while consumers gain peace of mind knowing their system is built to global safety benchmarks.
How to Verify a Solar Battery’s Safety Before Buying?
Before purchasing a battery system, look for certification labels on the product or ask your supplier for test reports. Most reputable manufacturers list compliance with UL, IEC, and UN standards on their specification sheets.
Even a UL-listed battery can be unsafe if improperly installed. Always hire a certified solar installer familiar with National Electrical Code (NEC) standards and local building requirements.
A built-in BMS adds an additional layer of protection. It continuously monitors voltage, temperature, and state of charge, automatically shutting down the system if something goes wrong.
Best Practices for Maintaining Solar Battery Safety
Even certified systems require proper handling and maintenance to ensure long-term safety.
- Avoid placing batteries in sealed rooms, airflow reduces heat buildup and extends lifespan.
- Inspect cables, terminals, and casings for corrosion or physical damage at least every 6–12 months.
- Manufacturers often release firmware updates that enhance safety functions in the BMS. Make sure your system is up-to-date.
- Never attempt to open or modify a solar battery module yourself. Doing so may void certification and introduce serious safety risks.
Solar batteries are the backbone of modern renewable energy systems, but safety certification is non-negotiable. Standards like UL 9540, UL 1973, IEC 62619, and UN 38.3 ensure that your system performs efficiently and safely under all conditions.
Before purchasing or installing a solar battery, always verify its certifications, work with trusted professionals, and follow best safety practices. When properly certified and maintained, a solar battery doesn’t just store clean energy, it protects your home, your investment, and the environment.
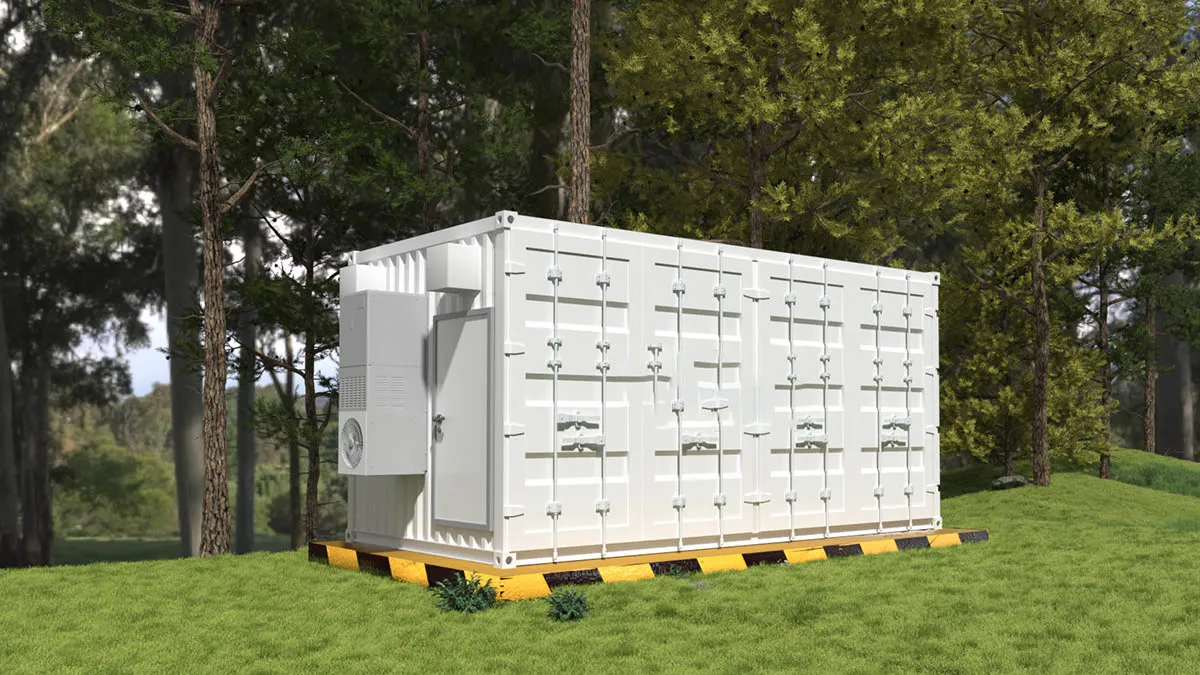
Are Solar Batteries Weatherproof or Can They Be Installed Outside?

Most modern solar batteries are designed to be weatherproof and can be safely installed outdoors, as long as they meet the proper IP (Ingress Protection) or NEMA standards. For example, batteries rated IP65 or higher are resistant to dust and rain, while NEMA 4 or 4X enclosures offer added protection against corrosion and moisture, making them suitable for outdoor environments.
However, even weather-rated batteries should be installed in shaded, ventilated areas to prevent overheating and ensure consistent performance. That said, “weatherproof” doesn’t mean maintenance-free. Extreme temperatures, humidity, or flooding can still reduce battery efficiency and lifespan.
To ensure long-term reliability, it’s recommended to use a protective cabinet or cover, avoid direct sunlight exposure, and schedule regular system inspections. With proper installation and care, outdoor solar batteries can perform just as well as indoor systems, delivering clean and stable energy for years to come.
As solar energy systems become more common, many homeowners wonder whether solar batteries can be safely installed outdoors. After all, weather conditions such as rain, snow, heat, and humidity can affect battery performance and lifespan. The good news is that modern solar batteries are designed to handle a wide range of environmental conditions, but proper installation, protection, and maintenance remain essential.
Understanding Weatherproof Ratings (IP and NEMA Explained)
When evaluating whether a solar battery can be installed outside, one of the most important specifications to check is its IP (Ingress Protection) or NEMA rating. These ratings describe how resistant a device is to dust, water, and other environmental factors.
IP Ratings:
An IP65 or higher rating generally means the enclosure is fully dust-tight and protected against water jets or rain.
For harsher climates with heavy rain or snow, an IP66 or IP67 battery is recommended, offering protection against strong water exposure and even temporary immersion.
NEMA Ratings:
In North America, the NEMA 3R, 4, or 4X ratings indicate varying levels of outdoor suitability, with NEMA 4X offering corrosion resistance for coastal or humid environments.
It’s worth noting that while the battery enclosure may be weatherproof, extreme temperature swings can still affect charging efficiency and overall battery health, especially for lithium-based models.
Outdoor Installation Best Practices
Even if your solar battery is rated for outdoor use, the installation location plays a major role in maintaining performance and safety. Here are some practical tips.
- Choose a shaded or semi-covered area: Direct sunlight can cause overheating, reducing the lifespan of lithium-ion cells.
- Ensure proper ventilation: Batteries generate heat while charging and discharging. Adequate airflow helps prevent temperature buildup.
- Avoid low-lying areas prone to flooding: Elevate the battery slightly off the ground and protect it from water pooling.
- Use weatherproof enclosures or cabinets: Even weather-rated batteries benefit from an additional layer of protection.
For regions with freezing winters, batteries may need thermal management systems or insulated covers to maintain optimal internal temperatures between 15°C and 30°C (59°F–86°F).
Maintenance, Longevity, and Safety Considerations
Outdoor installations require periodic maintenance to ensure reliability over time. Here’s how to keep your system performing optimally:
- Inspect regularly for corrosion, dirt, or moisture buildup around electrical terminals and enclosure seals.
- Monitor battery performance through the manufacturer’s app or monitoring system. Many hybrid inverters now feature built-in diagnostics for temperature and voltage health.
- Schedule annual professional checkups, especially for systems exposed to salt air, heavy rain, or extreme temperatures.
Also, remember that not all batteries are suitable for every environment. LiFePO₄ (Lithium Iron Phosphate) batteries are more stable under high temperatures and have lower fire risks compared to other lithium chemistries, making them ideal for outdoor setups.
Yes, many modern solar batteries are weatherproof and suitable for outdoor installation, provided they meet the correct IP/NEMA standards and are installed under proper conditions.
However, “outdoor-rated” doesn’t mean “indestructible.” Protection from direct sun, flooding, and temperature extremes is still essential for maximizing efficiency and extending lifespan.
Whether you choose a garage, utility wall, or dedicated outdoor cabinet, always consult a certified solar installer to ensure compliance with local electrical codes and manufacturer guidelines. With the right setup, your solar battery will stay safe, efficient, and reliable, rain or shine.
What Is Inverter Clipping / Solar Battery Clipping Impact?
Inverter clipping happens when your solar array’s DC power output exceeds the inverter’s AC conversion capacity. Since the inverter can only convert a limited amount of energy at any given time, any excess energy above that threshold gets “clipped” or lost.
Clipping often occurs during peak sun hours (midday), especially if the DC-to-AC ratio is high (i.e. more solar panels per inverter capacity) to capture more energy during lower irradiance periods.
For example, if you have a 6 kW solar array connected to a 5 kW inverter, the panels might produce their maximum power at midday on a sunny day. But because the inverter can only process 5 kW, it will cap the output, effectively flattening the top of your power curve.
While this might sound like a major issue, a small amount of clipping is actually normal and even strategically planned in many systems. Oversizing the panel array slightly relative to the inverter (a practice known as DC-to-AC ratio optimization) helps the inverter operate more efficiently during morning and afternoon hours when sunlight is weaker.
How Inverter Clipping Affects Solar Battery Charging and Efficiency
In systems with solar batteries, inverter clipping can limit how quickly your battery charges, especially during peak sunlight hours. If the inverter is already operating at full capacity converting energy for household use and grid export, it might not have enough bandwidth to send additional power to the battery.
This leads to two main impacts:
- Reduced charging potential: Your battery might not reach full charge by the end of the day.
- Wasted solar energy: Some of the energy your panels generate goes unused because the inverter can’t process it.
That said, not all clipping is bad. Slight clipping (up to 5–10%) can balance system cost versus efficiency, allowing you to use a smaller, more affordable inverter without losing much production annually. The key is designing the right inverter-to-panel ratio based on your energy needs and battery capacity.
Pairing a hybrid inverter or DC-coupled battery system can reduce clipping losses since DC power from the panels can charge the battery directly before conversion to AC, maximizing efficiency.
How to Minimize Clipping Losses in Your Solar + Storage System
To reduce the impact of inverter clipping and get the most out of your solar battery, consider the following strategies.
Choose an inverter with enough capacity to handle your system’s peak generation while maintaining a balanced DC/AC ratio (typically between 1.1 and 1.3). Oversizing the array slightly is fine — but too much oversizing will increase clipping losses.
Hybrid inverters can handle power flow between panels, batteries, and loads more flexibly. DC-coupled systems, in particular, allow direct DC charging without passing through the inverter, eliminating unnecessary conversion and clipping loss.
Modern inverters and battery management systems include real-time performance dashboards. Monitoring helps identify clipping patterns, guiding future upgrades or adjustments to your array size.
If your utility offers time-of-use (TOU) rates, program your battery to charge during midday clipping periods and discharge during evening peak demand, turning potential losses into financial gains.
Inverter clipping is a normal and manageable aspect of solar system design, not necessarily a flaw. A little clipping ensures your inverter runs efficiently throughout the day, but too much can limit battery charging and waste valuable solar power.
By understanding your system’s power balance, using hybrid or DC-coupled inverters, and regularly monitoring performance, you can minimize losses and ensure every ray of sunshine contributes to your home’s clean energy supply.
When properly designed, even systems that experience mild inverter clipping can still deliver over 95% of their expected annual output, keeping your investment both efficient and cost-effective.
How to Monitor Battery Health & Warning Signs?
Solar batteries are the heart of any solar energy storage system, storing excess electricity during the day and providing power at night or during outages. To ensure long-term performance and safety, regular monitoring and early detection of warning signs are crucial. Without proper maintenance and tracking, even the most advanced LiFePO₄ or lithium-ion batteries can experience reduced capacity, higher internal resistance, or sudden failures.
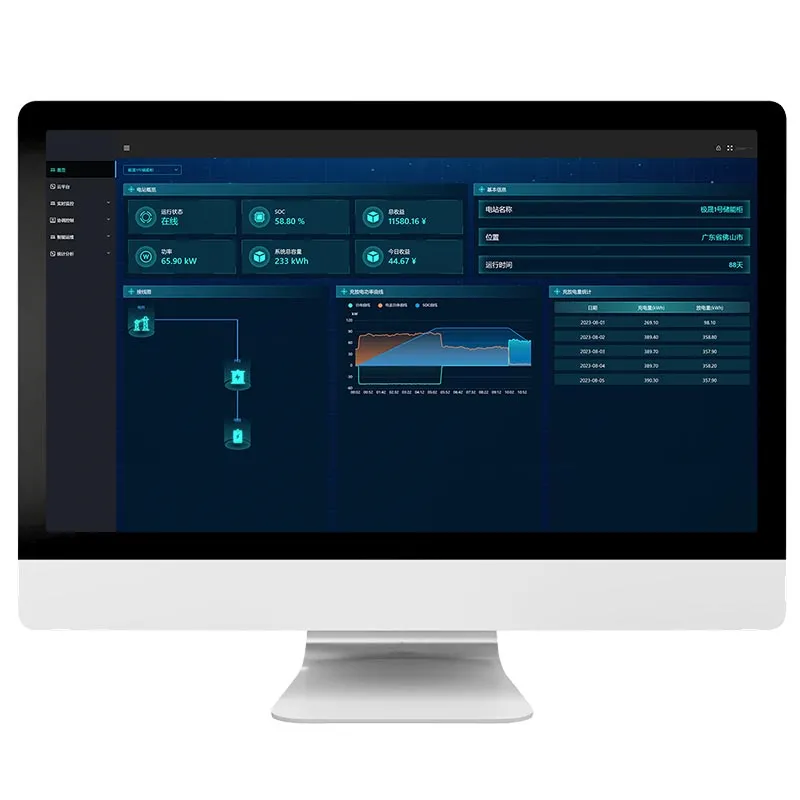
Monitoring the health of your solar battery is essential to ensure long-term performance, efficiency, and safety. Regularly checking your battery’s state of charge (SOC), voltage levels, and temperature helps detect potential issues early.
Modern solar systems often include smart monitoring apps that provide real-time data on battery performance, energy flow, and system efficiency, allowing homeowners or facility managers to identify irregularities such as slow charging, unexpected drops in capacity, or higher-than-normal discharge rates.
Recognizing warning signs early can prevent costly failures. Common red flags include overheating, unusual noises, rapid capacity loss, or frequent inverter faults. If your solar battery discharges too quickly or fails to hold a full charge, it may indicate aging cells or BMS (Battery Management System) malfunctions.
Routine inspections, software updates, and temperature control are key to maintaining battery health and ensuring your solar energy system continues to run efficiently and safely for years.
Key Metrics to Monitor Solar Battery Health
Monitoring a solar battery involves tracking several performance indicators that reflect its condition and efficiency. Most modern systems include a Battery Management System (BMS) or a monitoring app that provides real-time data. Here are the main metrics to watch.
- The State of Charge represents the current energy level of your battery compared to its total capacity. A healthy battery maintains a consistent SOC curve across daily charge-discharge cycles. If your battery is draining faster or not reaching a full charge, it may indicate capacity degradation or inverter misconfiguration.
- This is the most important metric for long-term monitoring. SOH measures the battery’s total usable capacity compared to its original factory rating. For example, if a 10 kWh battery now only delivers 8.5 kWh, its SOH is 85%. Regularly tracking this value helps forecast when the battery will need servicing or replacement.
- Abnormal voltage fluctuations or extreme temperatures can harm a battery’s internal chemistry. Most LiFePO₄ systems operate best between 15°C and 30°C (59°F–86°F). Consistent readings outside this range may trigger automatic protection modes or reduce efficiency.
- Each full charge and discharge is considered one cycle. High-quality lithium batteries are typically rated for 6,000–10,000 cycles, equivalent to 10–15 years of use. A sudden drop in cycle efficiency could signal imbalance between cells or BMS calibration issues.
Common Warning Signs of Solar Battery Problems
Identifying early warning signs allows you to act before small issues become costly failures. Below are the most common indicators that your solar battery needs attention.
If your battery feels excessively hot or cold to the touch, it could point to poor ventilation or internal thermal imbalance. Persistent overheating may trigger safety shutdowns and reduce lifespan.
A healthy battery should hold its charge for several hours, depending on load demand. If it drains unusually fast or takes longer than normal to recharge, the issue could be due to cell degradation, inverter limitations, or poor calibration.
Fluctuating SOC readings, voltage drops, or communication errors between your inverter and battery app may indicate sensor faults or data misalignment within the BMS.
Buzzing sounds, swelling, or strange smells are serious red flags. Immediately disconnect the battery and contact your installer, continuing operation could pose safety risks.
How to Maintain Battery Health for Long-Term Performance?
Good monitoring is only effective when combined with proper maintenance practices. Here’s how to ensure your battery stays healthy for years.
Brands like Sigenergy, Tesla, and BYD offer user-friendly apps to track performance metrics. These platforms often include automatic alerts for anomalies like overvoltage, high temperature, or communication loss.
Even outdoor-rated batteries should be installed in shaded, ventilated areas, away from direct sun or freezing conditions. Stable temperatures significantly reduce cell degradation over time.
A certified technician can perform capacity testing, firmware updates, and BMS recalibration to keep your battery running efficiently. Preventive maintenance also ensures compliance with warranties.
Battery manufacturers often release updates that improve charging algorithms and thermal management. Keeping your system’s software current can prevent efficiency losses and reduce risk of errors.
Regular monitoring and proactive maintenance are essential for maximizing both the lifespan and return on investment of your solar battery system. By tracking core indicators like State of Charge, State of Health, and temperature, you can quickly identify early warning signs and take corrective action before major failures occur.
Today’s smart inverters and BMS platforms make battery health tracking easier than ever, giving you real-time insights into your energy system’s performance. With proper attention and care, your solar battery will continue to deliver reliable, sustainable power for a decade or more.
If you would like to know more about solar battery performance, please refer to the page Solar Battery Performance and Charging Time.